Tina Knowles Gives Us a Step by Step in Creating the Perfect Natural Wave and It’s a Must See

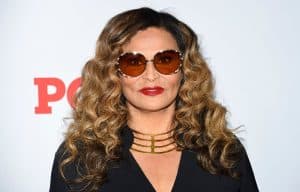
Need a masterclass on how to create soft waves and curls? Look no further, because queen momma Knowles has dusted off her stylist chair and invited us to sit down and soak in it all her stylist tips and tricks on how to create perfect natural-looking waves. She shares her secrets to using a professional iron and how to make thinning hair look full. No, this is not her new hobby, Knowles has been around the shampoo bowl before. Not only was she the creative director to one of the hottest girl groups in history but she was a certified hairstylist who owned a popular hair salon in Houston Texas in the ’90s. “I am a professional,” she jokingly reminds us. Yes, Ms. Tina and we’re here for every bump and curl!
“You know a lot of people have asked me how I get this soft tousled, not too curly kind of look…so I decided I would try to show you guys.” Says Knowles as she sits with one half of her hair in curls and the other half straight. She wastes no time getting down to business.
So what I’m going to do is part the top part of my hair and section it off to demonstrate how I get these curls. “Now I’m using a professional iron because I am a professional.” She jokes admitting the real reason why she was using a marcel iron is that her eclectic curling iron broke. Note to self-first lesson, it’s great to have options, you never know. “This is really important,” she adds, “don’t try to use this (Marcel Iron) if you don’t know what you’re doing, but if you do, you know that you rub it on a white tissue and if it doesn’t burn the tissue then it won’t burn your hair.”
And then she gets down to business. “So I’m going to take a pretty big section, Which is not saying a lot because my hair is not as thick,” she admits. “Because as you get older your hair gets thinner and also when you wear wigs and weaves and hat type of thing your hair gets thinner as well.” Continuing to drop gems as she wraps her hair around the curling iron. “So I’m gonna hold it on there and hold it until I can feel the heat on my fingers getting really hot, which means it’s going all the way through the hair. Then when you let it down,” releasing the hair from the iron, “this is what you get” as she shows her audience what the curl looks like. “You get this nice little wavy natural-looking wave and it gives you a different look than just doing a curl like we used to do, which was just curling it around and doing a candy curl. This is softer, more natural and it’s easy.”
“Again,”as she shows the technique of wrapping her hair around the iron, “I’m going to hold it,(the hair on the curling iron) until I can feel that heat coming through my fingers to the top layer of the hair.” Moving to show us another angle all while holding the ends of the hair that she didn’t wrap around the iron. “And then I let it go” running her hands through to blend both sections. “You can see that I’m not having to do a lot of curling in a lot of little tiny pieces like it is easy to do,” she adds. “And there’s another thing that you should do. It’s called Off-Base. ( A curling technique where the hair is flat or smooth at the scalp top portion of your hair and the wave is created at the bottom of your section) You see how I’m leaving a lot of hair straight? because the front of this hair I don’t want to curl it too tight because I want it to have the length. So I’m leaving the top part straight but when I do the top layer I’m gonna do the opposite. I’m gonna do it where the top layer is gonna do it closer to the scalp so it gives me volume,” talking while she curls.
“I’m not gonna bore you with all the pieces. I’m gonna show you how to do a top piece.” She adds as shows us how to do the Off Base technique. “So this part I’m taking the front part and then you see I’m not going too close to the scalp because I like my hair kind of straight and then dropping so it looks a little more natural I’m gonna hold it.” as she turns for us to see the waves from another angle. “Again I’m holding it (the hair) and putting my finger on it and when it gets too hot for my finger, then I know it (the heat) penetrated through all layers of the hair, ok like so,” as she shows us a newly waved section of hair. “If I wanted it to be tighter to the scalp then that’s called On-Base. And what you do then is you take the hair and you go really close to the scalp and you wrap it (the hair) around that way and that’s called On-Base and yall will notice that that’s gonna give me more of a hump at the top that’s curlier towards the scalp.” As she waits for the heat to touch her fingers, releasing the curl showing the audience why it’s on base because it has a hump at the top. So I’ll show ya’ll the final product the final results of thwart it looks like in a minute so I don’t bore you,” and then she shows us the finished look.
Watch the entire tutorial here.
The post Tina Knowles Gives Us a Step by Step in Creating the Perfect Natural Wave and It’s a Must See appeared first on The Source.


